Straw Bale Gardening
Straw bale gardening is a great medium for flowers and vegetables. It combines regular, vertical, and raised gardening all into one. This wasmy first attempt at straw bale gardening and I certify will use straw bales again next year – bu…t some plants do like dirt better. The things I enjoyed most about straw bale gardening was it’s easy to set up, its affordable, raised beds, and nearly no weeding.
My name is Angie Saltman, and I live in Grande Prairie, Alberta. Gardening in northern Canada can have its challenges. If you dig in my yard you will certainly find clay. This year I did not want to fight with clay, so I was looking for alternatives.
I started researching raised garden ideas and came across a straw bale garden. After a week of research, my mind was made up, I was going to give the straw bale garden a try.
Planning & Prepping
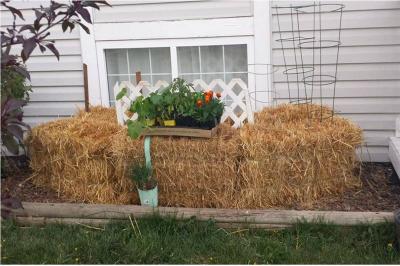
First things first – Start planning where the new garden was going to go. I wanted two gardens, one in the front of our home to get the full sun to and one in the back that was full sun to full shade. I measured and estimated how many bales of straw I would need. I looked for straw online but there wasn’t much on kijiji in the spring. I ended up buying half from a local farmer and half from Keddies just down the street. Best to plan your garden and purchase the straw in the fall. Try no to use oat straw (oats will sprout.)
I raked and leveled my dirt garden, then covered them with landscaping fabric. You can make your straw bale garden anywhere. Then I moved the straw bales into position – The straw needs to be prickly side up!
- 5 in the front, (full sun)
- 21 in the back. (full sun to full shade)
Once you lay down straw, condition the straw for 10-14 days prior to planting. Don’t skip this step. Water the straw bales every day, and every second day fertilize and water.
I received many odd looks the first couple of weeks when watering the straw. My neighbor’s young children were very interested in why I was watering the straw; I told them I was growing some cows. Other neighbors came over to ask what I was up to.
Be sure to use a fertilizer that will not burn your new transplant roots or seeds! I used regular grass fertilizer the first week and purchased a 4-8-4 fertilizer the second week. Next year I will be using multi-purpose miracle grow that attaches to my hose. If you see mushrooms rejoice because decomposing has started.
Planting
I drew a diagram and planned where all my veg and flowers were going to grow. I wanted to grow everything that I like, so next year I will know what veg and flowers grow well in the straw and what ones prefer dirt.
Some dirt is required; I went and picked up a bale of wheedles dirt from peavey mart. One bale of dirt worked for my entire garden and a couple of potted plants. I planed a lot of different types of veg, flowers, and herbs. Some thrived and some did not enjoy the straw medium. Take a look at the straw vs dirt chart below.
The garden was planted on May 25th, I would recommend doing it sooner. To transplant chives, marigolds, petunias, and corn I simply dig out some straw, filled 2/3 with dirt, and moved the plant to its new home. They all thrived.
For seeds Make 2” trenches for all seeds, and plan accordingly. The soaker hoses worked ok, but by the end of the year, I was watering by hand as the soaker hose didn’t reach all areas of the garden.
- Straw loving plants Dirt loving plants
- Zucchini Marigolds
- beets Radish
- Wave petunias Potatoes (Transplanted – this maybe why they did not do well)
- Lettuce, spinach (all 6 types) Carrots
- Corn (until my dog ate them) Cucumber
- Green peppers Tomatoes (I have never succeeded in growing awesome tomatoes)
- Thyme, rosemary, chives, Onions
- peas Beans (may have been from not enough water)
- Cabbage
- Brussels sprouts
- Wave and regular petunias
- Flowers – all varies did great!
Some plants that I put to the dirt-loving column above may have not done well because I am not a pro gardener. My soaker hose did not reach all the veg, for example, the marigolds I planted in the front of the bales (vertical) did not get a lot of water.
One of the nice things about the straw is you can use it as compost for next year’s garden projects!
To see more straw bale garden images please visit https://www.pinterest.ca/angiesaltman/straw-bale-garden/